PlaneTrackr – Help – Own Receivers
A free software simulating an ATC Radarscreen using ADSB Data.
General
PlaneTrackr allows you to use your own, standalone ADS-B receivers in multiple ways:
- Locally (in the same network)
- Remotely by using ADSBExchange Anywhere
- Remotely by using the OpenSky Network
Generally, it is recommended to run readsb from @wiedehopf (see automatic installation guide here), but any receiver setup that produces an aircraft.json or aircraft.list (RadarCape) file should work.
Local Receiver
To add a local receiver, follow these steps:
1. Find the path of the aircraft.json (or aircraftlist.json for RadarCape) on your receiver.
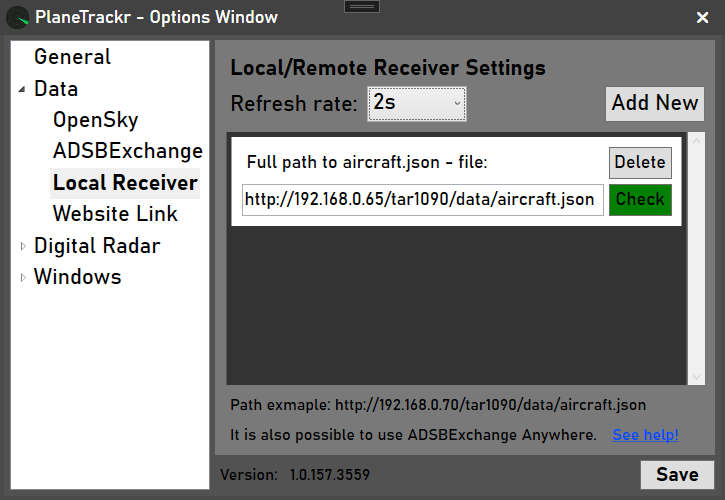
For a readsb/tar1090 setup, the path should look similar to this:
http://192.168.0.65/tar1090/data/aircraft.jsonFor a RadarCape setup, the path sould look similar to this:
http://192.168.0.65/tar1090/data/aircraft.json2. Open PlaneTrackr and go to Options -> Data -> Local Receiver
3. Click Add New
4. Enter the complete aircraft.json path into the provided box. Clicking Check confirms if the formating of the path seems correct.
5. Set the Refresh rate from OFF to 2s/5s/10s. It should look something like this:
6. Finally, click Save and confirm that data is received by refering to the top status bar. The number next to the little antenna symbol indicates how many aircraft are received by your local receiver:

Notes:
– If you have a fixed IP address or are using dynamic DNS, this method also works remotely. Port 80 forwarding might be required, depending on your Router/Firewall settings.
– If you use file-sharing solutions (like Samba) it is also possible to enter the path like this: file://192.168.0.65/tar1090/data/aircraft.json
Remote Receiver – Using airplanes.live
To add a remote receiver using airplanes.live, follow these steps:
- Install the airplanes.live Feed Script onto your receiver:
curl -L -o /tmp/feed.sh https://raw.githubusercontent.com/airplanes-live/feed/main/install.sh
sudo bash /tmp/feed.sh
2. Find your receiver’s UUID by opening following link: https://airplanes.live/myfeed/ – The UUID is displayed in the left column, below the “BEAST-0” line.

3. Open PlaneTrackr and go to Options -> Data -> Local Receiver
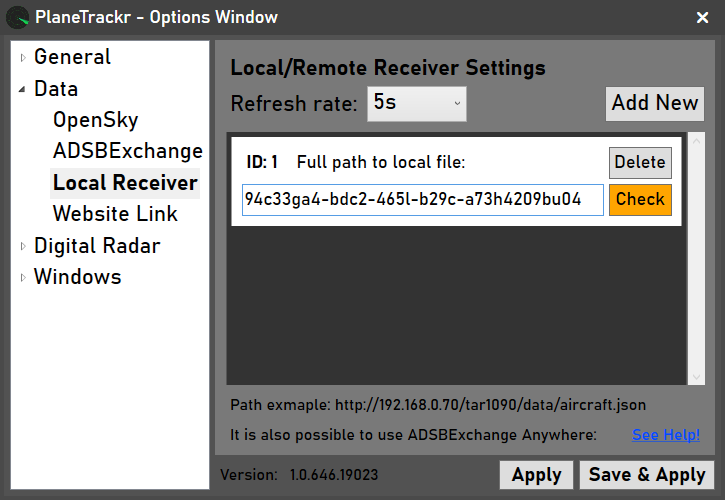
4. Click Add New
5. Enter the UUID into the provided box. Clicking Check confirms if the ID seems correct.
6. Set the Refresh rate from OFF to 5s/10s*. It should look something like this:
7. Finally, click Save and confirm that data is received by refering to the top status bar. The number next to the little antenna symbol indicates how many aircraft are received by your local receiver:
* Note: Setting the Refresh rate to 2s will not have any effect, as airplanes.live only updates every 5 seconds.
Remote Receiver – Using ADSBExchange Anywhere
To add a remote receiver using ADSBExchange Anywhere, follow these steps:
1. Install the ADSBExchange Feed Script onto your receiver:
wget -O /tmp/axfeed.sh https://adsbexchange.com/feed.sh
sudo bash /tmp/axfeed.sh
2. Install the ADSBExchange Anywhere Scritp onto your receiver:
wget -O /tmp/axstats.sh https://adsbexchange.com/stats.sh
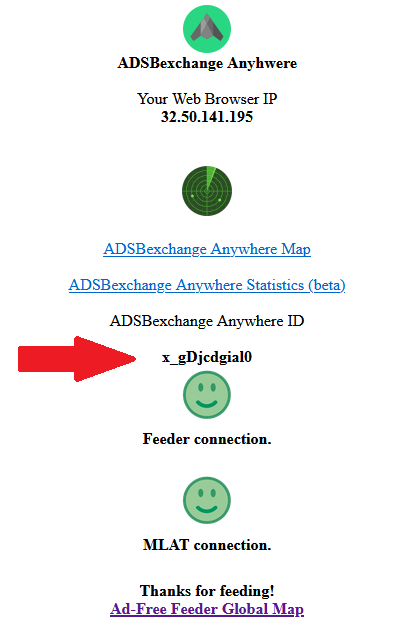
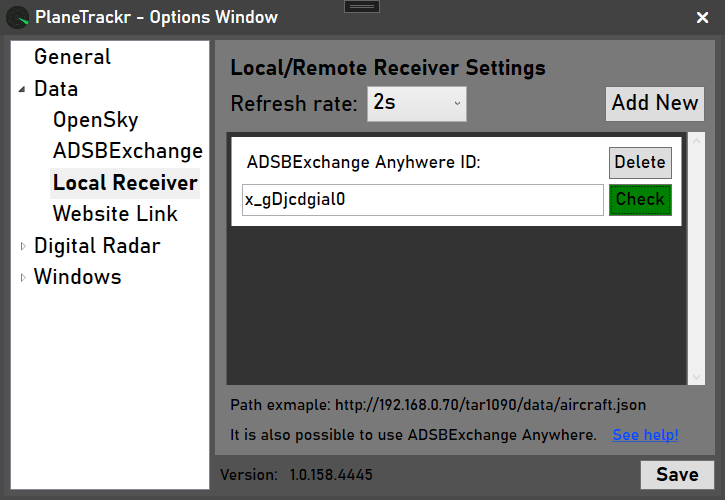
sudo bash /tmp/axstats.sh3. Find your receiver’s ADSBExchange Anyhwere ID by opening following link: https://www.adsbexchange.com/myip/ – The ID is displayed in the middle of the screen.
4. Open PlaneTrackr and go to Options -> Data -> Local Receiver
5. Click Add New
6. Enter the ADSBExchange Anyhwere ID into the provided box. Clicking Check confirms if the ID seems correct.
7. Set the Refresh rate from OFF to 5s/10s*. It should look something like this:
8. Finally, click Save and confirm that data is received by refering to the top status bar. The number next to the little antenna symbol indicates how many aircraft are received by your local receiver:
* Note: Setting the Refresh rate to 2s will not have any effect, as ADSBExchange Anywhere only updates every 5 seconds.
Remote Receiver – Using the OpenSky Network
To add a remote receiver using OpenSky, follow these steps:
1. Create an OpenSky Network Account and set up your ADS-B receiver to feed OpenSky (see their guide here).
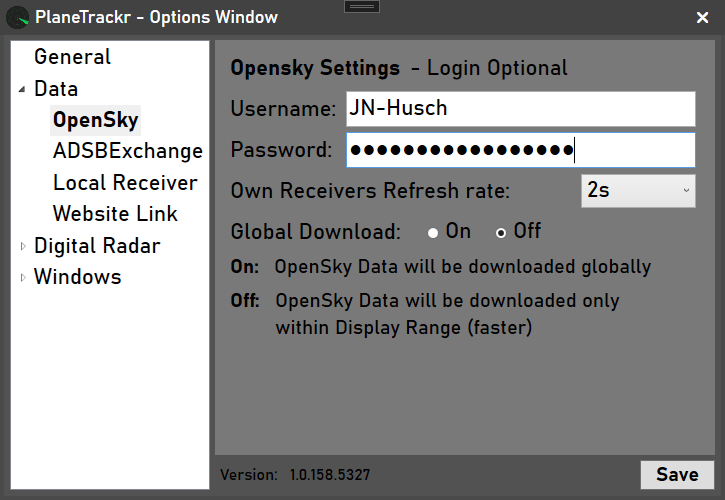
2. Open PlaneTrackr and go to Options -> Data -> OpenSky
3. Enter your OpenSky Username and Password into the provided fields
4. Set the Refresh rate from OFF to 2s/5s/10s. It should look something like this:
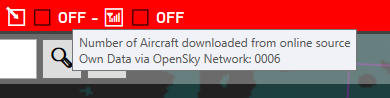
6. Finally, click Save and confirm that data is received by refering to the top status bar. When hovering your mouse over the left hand number (in the screenshot the circled OFF), a tool tip appears. The ToolTip shows the number of own receivers downloaded from OpenSky in the bottom row (0006 in the screenshot below).
(Static) File
It is possible to load a (static) file from Disc or Mounted Storage:
1. Open PlaneTrackr and go to Options -> Data -> Local Receiver
2. Click Add New
3. Enter the complete aircraft.json path into the provided box. Clicking Check confirms if the formating of the path seems correct.
4. Set the Refresh rate from OFF to 2s/5s/10s. It should look something like this:
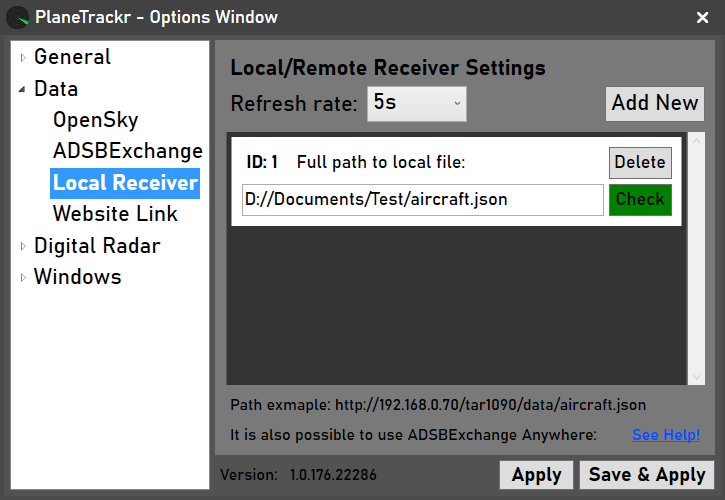
5. Finally, click Save and confirm that data is loaded by refering to the top status bar. The number next to the little antenna symbol indicates how many aircraft are loaded from the aircraft.json file: